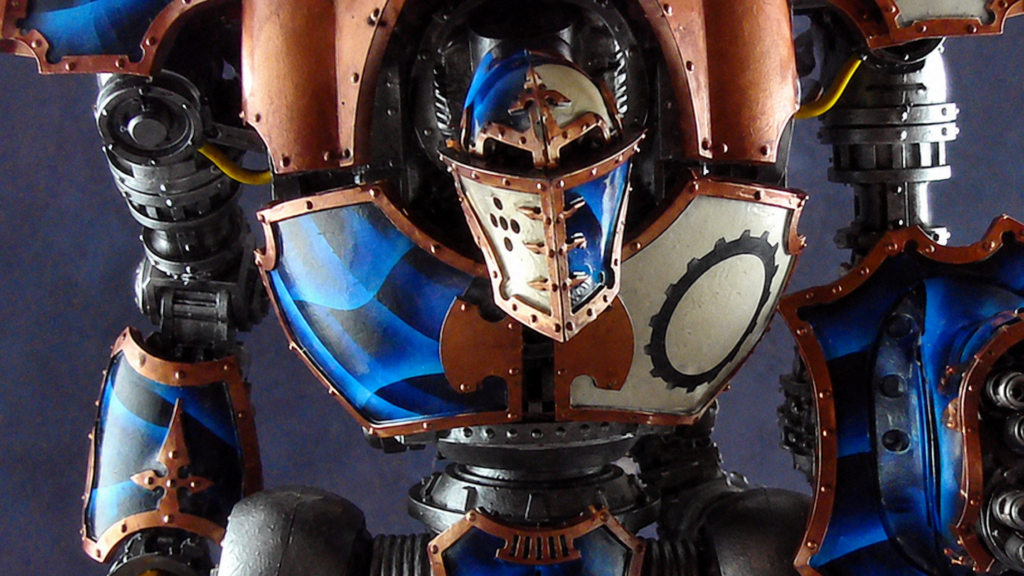

DISCOVER HOW TO CREATE A STRIKING NEBULA EFFECT ON YOUR MINIATURES USING AN AIRBRUSH, GHOST TINTS AND A SIMPLE STENCIL.
Painting outside the lines
Ever wanted to bring a little bit of the cosmos to your miniatures? With a few carefully chosen colours, an airbrush and a little creative freedom, you can create a stunning nebula effect that looks far more complicated than it actually is!
Inspired by the swirling colours and contrasting shadows of deep space, this technique is a fantastic way to add something a little different to your next miniature painting project.
The best part? You don’t need an expensive collection of equipment or years of airbrushing experience to give it a go. With a simple stencil, some white paint and a couple of Ghost Tints, you can create some really impressive results.
In this tutorial blog, we’re using Ghost Tint Blue and Ghost Tint Plasma Fluid, alongside Model Air White, to build up layers of colour, light and shadow. The result is a striking finish with plenty of depth and character.
So, get the airbrush ready and let’s create something a little out of this world!
Getting ready
WHAT YOU’LL NEED
Before we get started, you’ll need a few basic supplies:
- An airbrush
- A stencil or piece of card with cut-out shapes
- Model Air White
- Ghost Tint Blue
- Ghost Tint Plasma Fluid
- A suitable varnish or flat coat
You don’t need anything particularly fancy when it comes to your equipment. In the original demonstration, we’re using a relatively inexpensive airbrush, which works perfectly well for this technique.
Being able to adjust the airflow is particularly useful, as it gives you greater control when creating those fine lines and softer highlights.
As for the stencil, almost anything will do. The idea is simply to create some interesting lines and shapes across the surface. Don’t worry about finding the perfect pattern – a little randomness is exactly what we’re after!
Creating your own little galaxy
BUILDING THE INITIAL WHITE PATTERN
Every good nebula needs a little chaos! The first step is to create the underlying pattern that will eventually become our nebula.
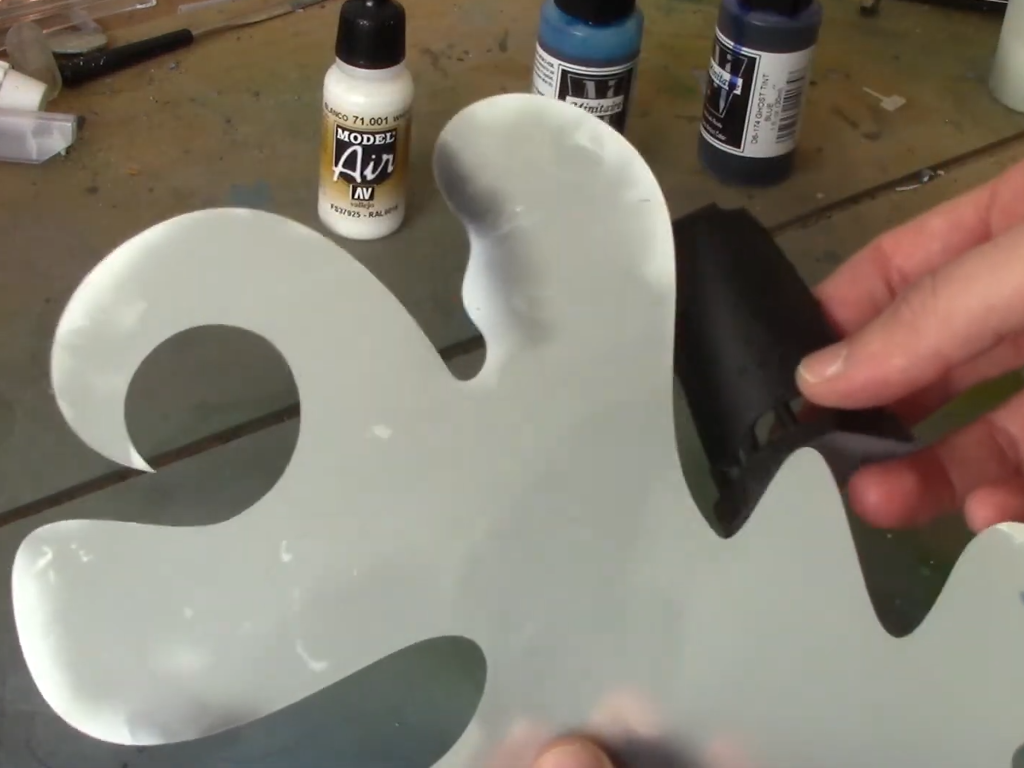
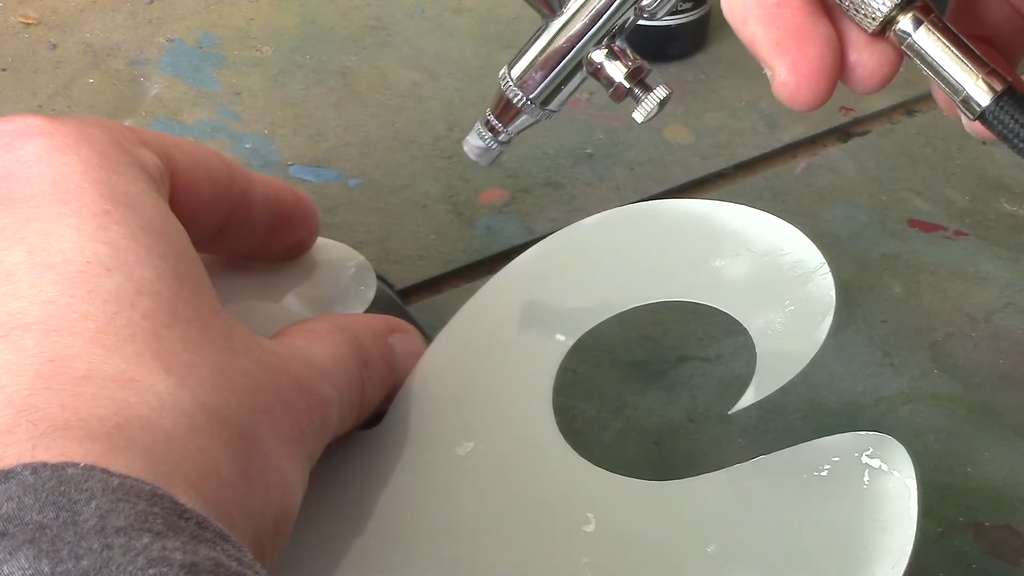
Position your stencil over the surface and, using Model Air White, begin airbrushing through the openings.
Start with a few parallel lines, then mix things up. Introduce some wavy lines, change direction and experiment with different shapes. There’s no need to keep everything neat or symmetrical.
In fact, the more natural and random the pattern looks, the better.
Try varying the amount of white you apply, too. Some areas can be a little heavier, while others should remain quite subtle. This will give us different levels of brightness to work with when we start adding colour.
Don’t worry about getting everything perfect. You can overlap lines, introduce new shapes and experiment with different stencil positions as you work.
One thing to watch out for is overspray. It’s easy to get carried away, but covering too much of the surface in white can leave everything looking a little grey and washed out.
We’re looking to create a collection of interesting lines and shapes, with plenty of darker areas still showing through. Once you’re happy with your pattern, it’s time to bring in the colour.
Bringing the colours to life
INTRODUCING GHOST TINT BLUE
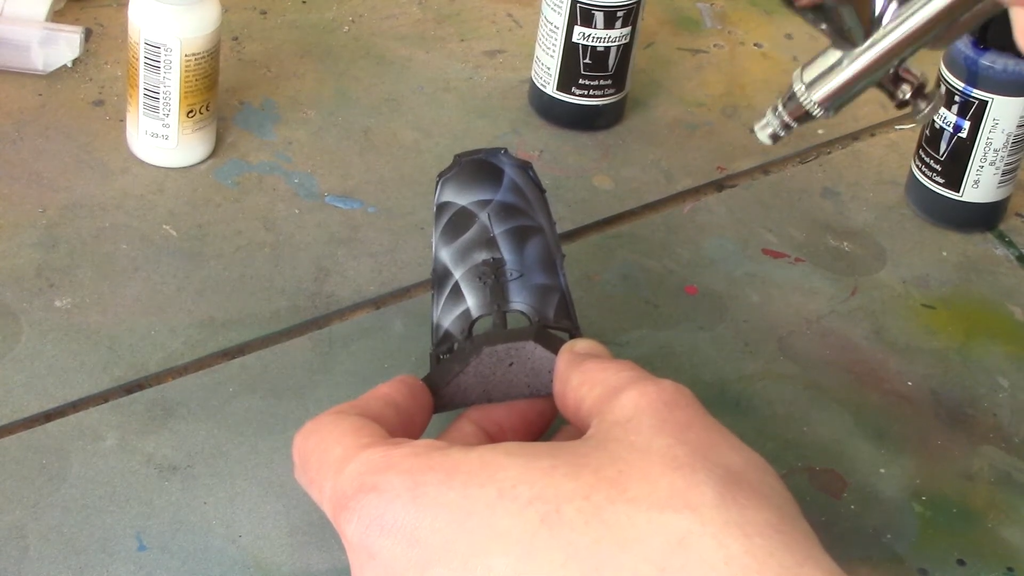
This is where things start to get interesting! Load up your airbrush with Ghost Tint Blue and begin applying it over the white pattern.
The key here is patience. Rather than spraying one heavy layer, build up the colour using several light passes. This gives you much more control and allows the blue to develop gradually.
As the tint settles over the white, you’ll start to see the pattern transform. The white areas take on a lovely blue hue, while the darker areas remain much deeper in colour.
Already, you should start to see that space-like appearance developing. It’s a simple process, but the contrast between the dark background and the blue highlights gives the effect plenty of depth.
Keep adding light layers until you’re happy with the colour.
Sealing in the effect – a little patience goes a long way
A LITTLE PATIENCE GOES A LONG WAY
Before moving on to the next stage, there’s one important thing to remember: let the Ghost Tint dry properly!
Once you’ve finished applying the Ghost Tint Blue, leave the paint to dry thoroughly. We’d recommend allowing around 6 – 12 hours, or even up to 24 hours if possible.
Once dry, apply a flat coat or suitable varnish to seal the Ghost Tints.
This is particularly important because Ghost Tints can bleed through subsequent layers of paint if they haven’t been properly sealed. Taking the time to protect the finish now will help prevent problems when you move on to the highlighting stages.
It might not be the most exciting part of the process, but it’s definitely worth getting right!
Adding the stars of the show – bringing back the white highlights
BRINGING BACK THE WHITE HIGHLIGHTS
With everything dry and sealed, it’s time to bring back the white.
Think of this stage as adding little pockets of light throughout your nebula. We’re not looking to recreate the entire original pattern, but rather pick out certain areas to give the effect more contrast and definition.
Using the stencil again, carefully apply Model Air White to selected sections.
You can revisit some of your original lines, add a few extra highlights or even introduce something completely new. There’s no strict pattern to follow here, so let your creativity take over.
The important thing is to keep the application light and controlled.
It’s very easy to apply too much white at this stage, which can overpower the colours underneath. Work gradually, building up the brighter areas until you’re happy with the balance.
You might find that certain sections need a little extra attention, while others look perfectly fine as they are. That’s absolutely fine. The beauty of this technique is that no two nebula patterns need to look the same.
The final cosmic touch – introducing Ghost Tint Plasma Fluid
INTRODUCING GHOST TINT PLASMA FLUID
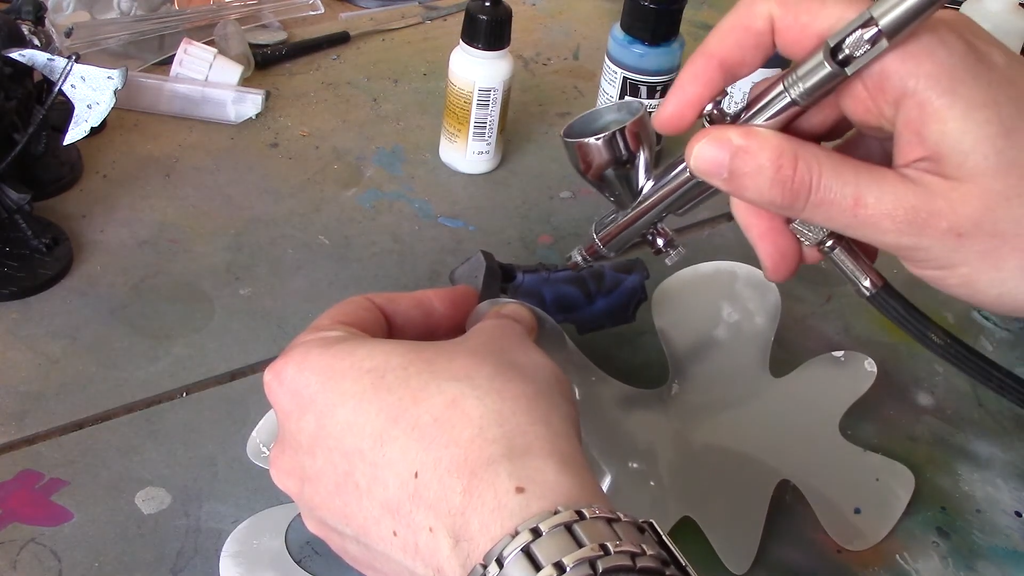
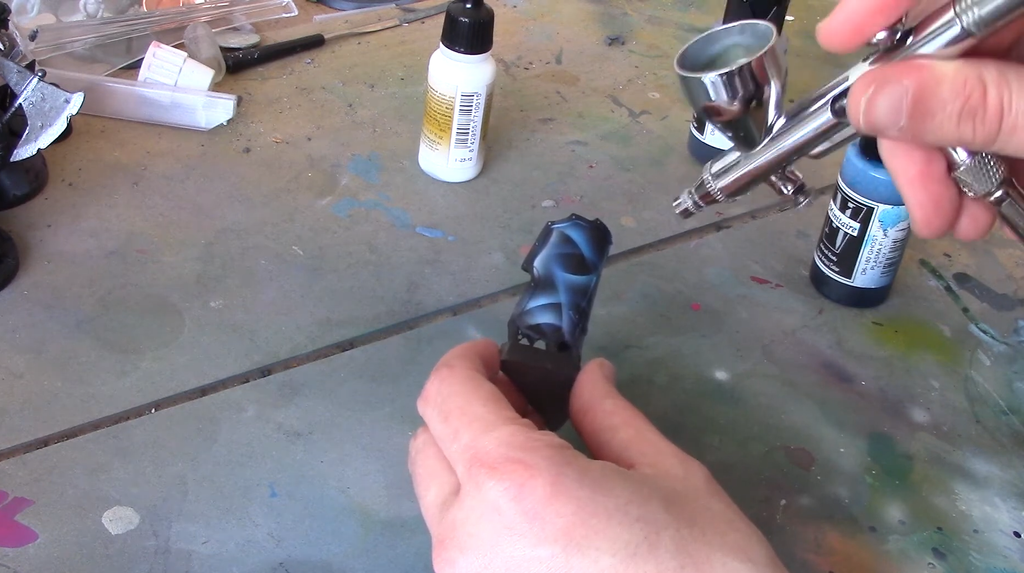
Now for one of our favourite parts of the whole process: it’s time to introduce Ghost Tint Plasma Fluid, and this is where the finished effect really starts to come together.
Apply the Plasma Fluid in the same way as before, using several light passes rather than one heavy application.
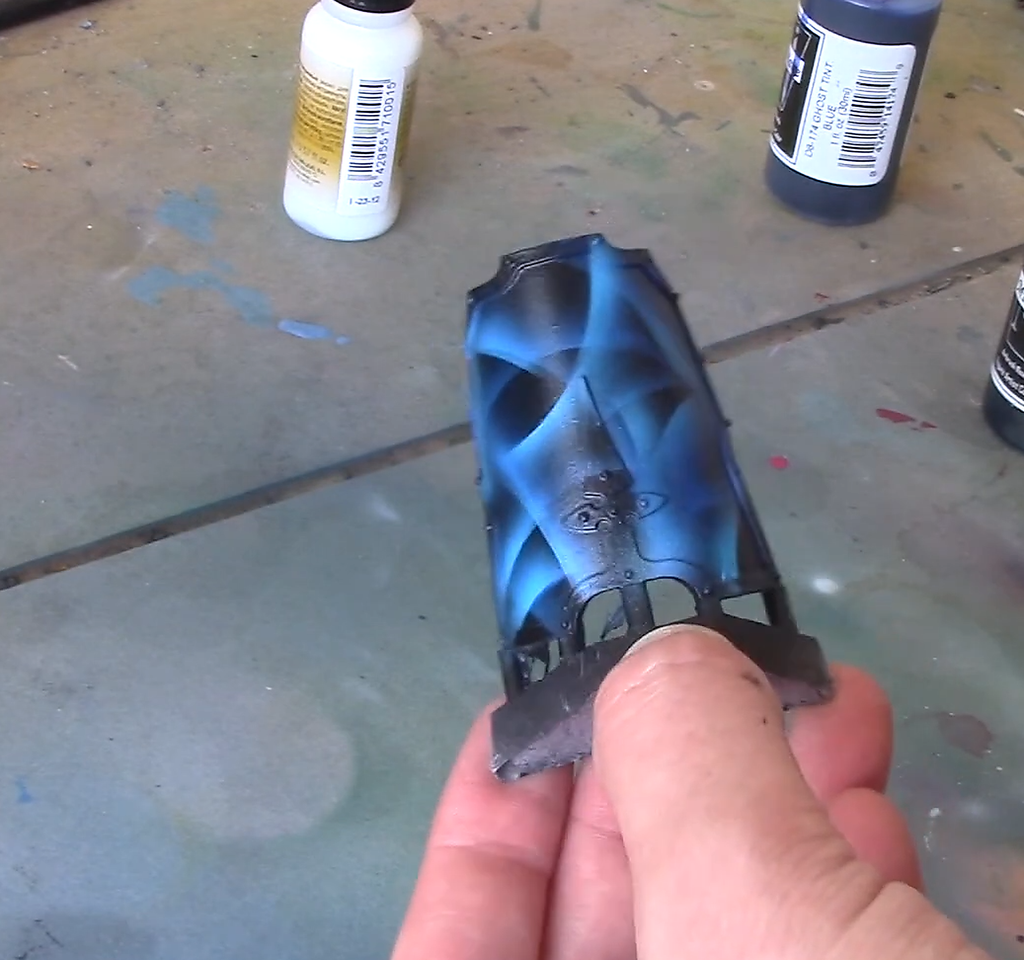
Concentrate on the highlighted areas and allow the colour to build gradually. As the Plasma Fluid develops, you’ll start to see those highlights become much more pronounced, adding another layer of colour and depth to the overall finish.
It’s a lovely way to bring the whole effect together, transforming what started as a few simple white lines into something that looks wonderfully atmospheric.
And just like that, your nebula is complete!
Ready to explore? – Experiment, Play and Create Something Unique
EXPERIMENT, PLAY AND CREATE SOMETHING UNIQUE
One of the things we love about this technique is just how much room there is to experiment.
You could try different stencil shapes, introduce new patterns or play around with alternative colour combinations to create something entirely different. There’s no need to follow the same lines or layout every time – let the airbrush do its thing and see where the effect takes you.
Whether you’re painting a miniature vehicle, a piece of scenery or simply looking to try something a little more adventurous, this is a brilliant technique to have in your painting toolbox.
So, why not give it a go? You might just discover your next favourite airbrushing technique!
Watch the original video
Want to see the technique in action? Watch the original Bitzbox tutorial on our old Youtube Channel, and follow along as we create this nebula effect step by step.